Slightly unconventional but far truer to life, this way of applying reverb to Virtual Instruments will have your mix sounding more realistic, more professional and much more enjoyable.
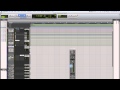
In this vid I take you through a walkthrough of how to set up reverb on a parallel auxiliary channel using a pre-fader bus following the main pan.
1 - Set up your instruments to play only a 'Dry' signal.
2 - Set up a stereo auxiliary track with a Reverb unit 'Inserted' in series on the track.
3 - Set up a stereo or mono bus to feed into the Reverb Auxiliary track. Make sure the bus is 'Pre Fader' and Follows the Main Pan.
4 - Feed your instruments into the reverb track via this bus you've just set up as a 'Send' from each audio Instrument track.
5 - Turn levels down completely on all instrument tracks.
6 - Set up a wet mix by adjusting the bus send levels and panning on each of the audio instrument tracks. Your mix should be at least 6dBFS less than your intended RMS of your final mix but this is subjective. Add more or take some away if you think it needs it.
NB: All of your instruments at this point will sound like they're packed up against the furthest away wall of your reverb space (eg: Cathedral) only separated Left and Right by Panning
7 - Gradually bring your in your dry signal of each track one by one by increasing the Audio Instrument Track volume until it sounds as close as you want it to be. (Consider correct orchestral placing for orchestral instruments.)
8 - Fine Tune your reverb and Dry signal mix until you're happy with the sound.
Reverb, Audio, Mixing Mastering, Music Production, Orchestra, Orchestral, Classical, Space, 3D, QL Spaces, virtual instruments, East West, Quantum Leap